
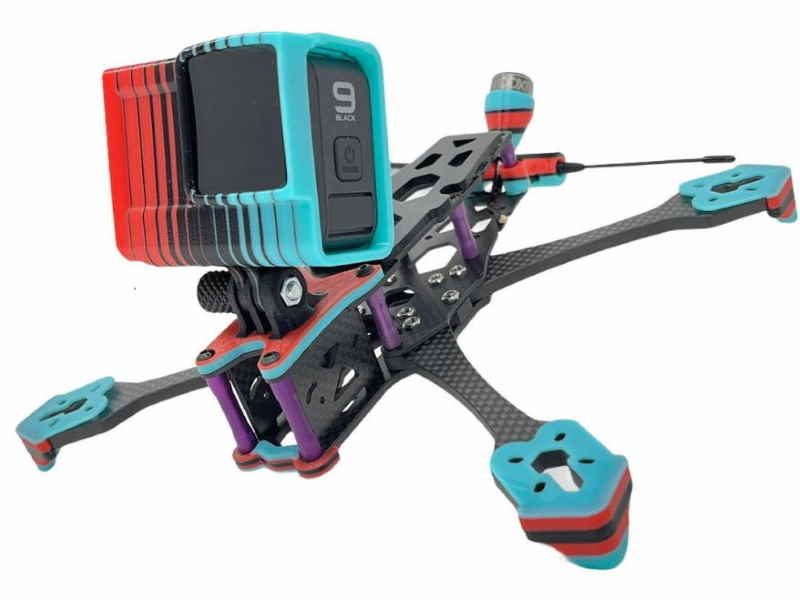
Best 3D Printer for Drone Parts: Top Picks 2023
Awestruck by the intricate-looking plastic thingies yet? Luckily for us, we live in an age where plastic is available and is much easier to handle and manipulate into complex shapes. 3D printers have come a long way in the past 10 years and are much more affordable these days.
A 3D printer is a long-term investment, multiple $10 3D printed mounts will recoup the money of the 3D printer, plus there’s also the added bonus of 3D printing a beautiful vase for the Missus. There are $100 3D printers that work so well that for once we as consumers can think that we are ripping off the manufacturer. Without further ado, Let’s get started….
Which 3D Printer to buy For Printing Drone Parts?
Creality Ender 3 V2
Budget FDM printer

Budget FDM printer
Creality Ender 3 V2
Ender 3 provides cheap and reliable 3D printing on a machine that doesn’t give you a headache with its constant errors and faults, the Ender 3 V2 certainly is your best bet.
Creality makes some of the most popular 3D printers while also providing features at a cheaper price point. The Ender 3 keeps much of the design features from the original Ender 3, with the V2 continuing the characteristic for balancing high-quality printing at $250, a competitive price tag. The build volume is a comfortable 220 x 220 x 250 mm. The equipped Bowden-style extruder gives you the ability to print your typical consumer filaments such as PLA, PETG, and, when carefully managed, TPU. The Ender 3 V2, however, is the addition of belt tensioners, updated electronics that include a 32-bit board and print-silencing stepper motor drivers, an integrated tool storage drawer, touchscreen UI, among a few other improvements. For most hobbyists looking for a cheap and reliable 3D printing on a machine that doesn’t give you a headache with its constant errors and faults, the Ender 3 V2 certainly is your best bet.
Prusa Mini+ FDM Original
Top of the line
Top of the line
Prusa Mini+ FDM Original
The Prusa Mini+ is different from its larger forebear in terms of build volume and size, but the results are largely the same with a fantastic print quality, effortless operation, and class-leading features.
It comes equipped with a removable magnetic PEI-coated print bed, thoroughly developed firmware with vast hardware-backed features such as mesh-bed leveling, regular firmware updates fix bugs, make improvements, and even add all-new features. Arguably, the best thing about Original Prusa machines is the continuing support they receive from the company. The Mini+ is also mini in terms of build volume, coming with a build volume of 180 x 180 x 180mm, which is smaller than the Ender 3 V2’s build volume.
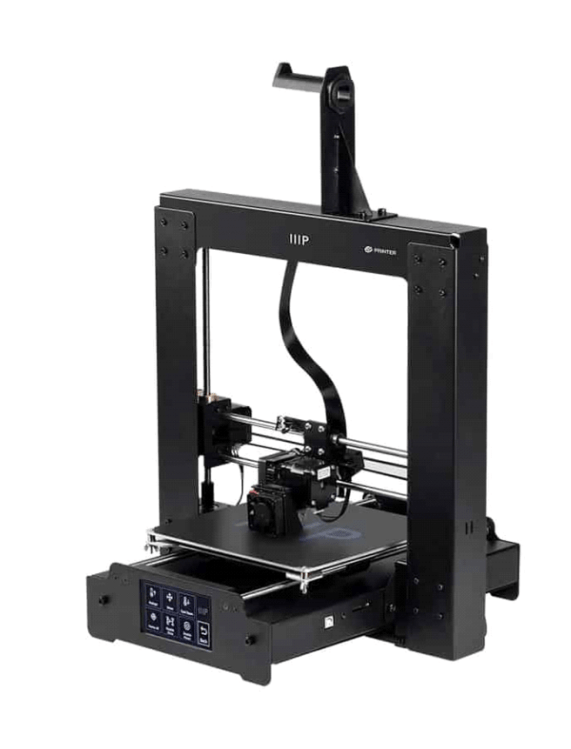
Monoprice Mini Delta V2
Cheap 3D Printer
Cheap 3D Printer
Monoprice Mini Delta V2
The Monoprice Mini Delta V2 is an inexpensive 3D printer that scores high on most of the aspects and falls short on some. Mini Delta is one of the cheapest Delta 3D printers. It is easy to set up and use with no calibration needed and is ready to print out of the box.
It consistently delivers prints of acceptable quality, but its smooth and almost misprint-free operation makes it a good introduction to 3D printing. It’s also fast and supports a variety of filament types with the only major gripe being the small print area of 110x120mm. Incorporating features such as an adaptive touch screen, advanced auto-leveling, and an internal diagnostic system make it a pleasure to use. This black printer comes in a tiny package with a sturdy steel-and-anodized aluminum frame measuring H17.5 X W11.8 X D11 inches and weighs only 4 pounds.
Workings of a 3D Printer
Most commercial 3D printers use FDM, Fused Deposition Modelling, or SLA, Stereolithography, methods for 3D printing. Both the methods come under additive model methods but vary in which the material is formed.
FDM 3D Printers

Fused Deposition Modeling, as the name suggests fuses plastic in other words melt it, lays it on top of the print bed, and rapidly cools the molten plastic solidifying it. Plastic is molten and is printed layer by layer until the desired output/ model is built.
SLA 3D Printers

SLA printers also fall under the additive model method but vary with how the model is built. SLA printers work by hardening a liquid resin stored inside the 3D printer, and this liquid resin hardens when exposed to the light of particular wavelengths. The print bed moves through the tank with liquid as the object, is built layer by layer. Each layer is then hardened to a solid layer. The print bed then rises slightly to allow the next layer to harden, causing the object to gradually rise from the depth.
| Differences | FDM 3D Printer | SLA 3D Printer |
|---|---|---|
| Filament Materials | PLA, ABS, TPU, PETG, Nylon, and mixtures of wood, ceramics, metal, and carbon fiber. | Propriety resins, resins vary for every manufacturer |
| Filament Cost | $25-$30 | $80-$150 and $40-$80 for resin tanks that need to be replaced after using 3-5 liters of resin |
| Printing Speeds | Higher print speeds can be achieved at the expense of lower print quality | Higher print speeds can be achieved without compromising on print quality |
| Print Accuracy | Mediocre- High accuracy with 0.5 to 0.127 mm layer thickness. | Extremely accurate with a layer thickness of 0.01- 0.05mm |
| 3D Printer Costs | FDM 3D printers start from as little as $100 | SLA 3D printers cost as 3 times as much as a similar-sized FDM 3D printer |
| Advantages | – Inexpensive and Very affordable – Easy to operate – Larger construction volumes – Large user community to help novice users | – Can create complex and highly detailed models – High mechanical strength – Little to no post-processing |
| Disadvantages | – Calibration is often required to get accurate outputs – Limited in the complexity of the details they can produce – Cheaper printers have questionable print quality and reliability | – Higher average costs – Complex learning curve – Should be handled with care, resins are toxic |
MODE OF OPERATION
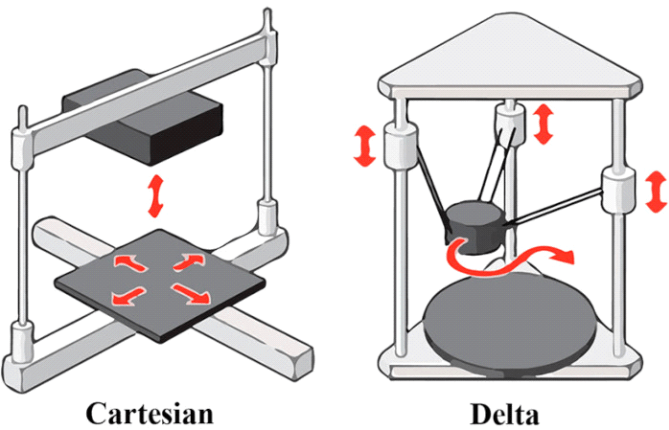
The bottom line, SLA is expensive and they are not suitable for most consumers. FDM technology has matured over time and some of the cheaper 3D printers do a decent job of 3D Printing that going cheap is an option. The most popular FDM 3D printers come in 2 modes or types of operation- Cartesian 3D printers and Delta 3D printers.
CARTESIAN 3D PRINTER
Cartesian 3D Printers move along the X, Y, and Z axes linearly to position the hot end in three-dimensional space. Usually, the hot end moves on the X- and Y-axes, whilst the print head or the print bed moves up and down on the Z-axis. Some 3D printers move the extruder up and down for each layer, whereas some Cartesian 3D printers have the print bed move up and down instead.
DELTA 3D PRINTER
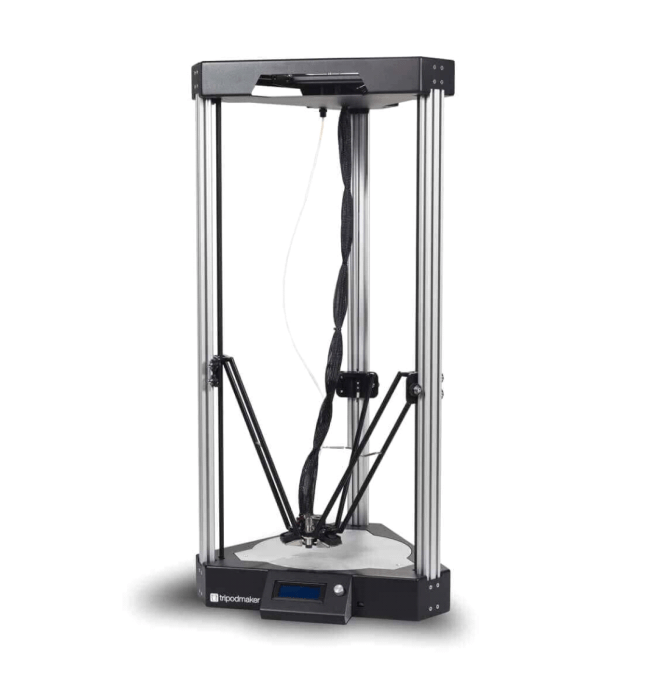
Delta 3D printers work with three arms fixed to vertical rails which can move both upwards and downwards within the cylinder print structure. The hot end is connected to the end of each arm with hinges, and the arms work together to adjust the position of the hot end. The coordinated movement of a delta printer’s arms controls the hot ends height (Z-axis) and location (X and Y-axes) relative to the print bed.
| Differences | Cartesian 3D Printer | Delta 3D Printer |
|---|---|---|
| Advantages | – Comparatively cheaper – Easily upgradable – Accurate and consistent prints – Large community support | – Can print taller objects – Relatively faster printing time – Takes up very little space |
| Disadvantages | – Bulky – Slower print speeds | – Difficult to troubleshoot and upgrade – Finicky operation – Steep learning curve |
TL;DR: Cartesian 3D printers are consistent and heavily upgradable whereas Delta 3D printers can print faster and give tall prints.
Now that we’ve outlined the differences between the 2 styles of printers, it is your turn to decide what’s the best style of 3D printer that suits you. Mind you, take into account the other things that you will possibly print apart from the 3D printing only FPV parts.
THE 3D PRINTING PROCESS
All 3D Printers need a model to print, and this model is a 3D object that’s designed in one of the CAD modeling software. This 3D model is fed into the 3D.
3D CAD MODEL
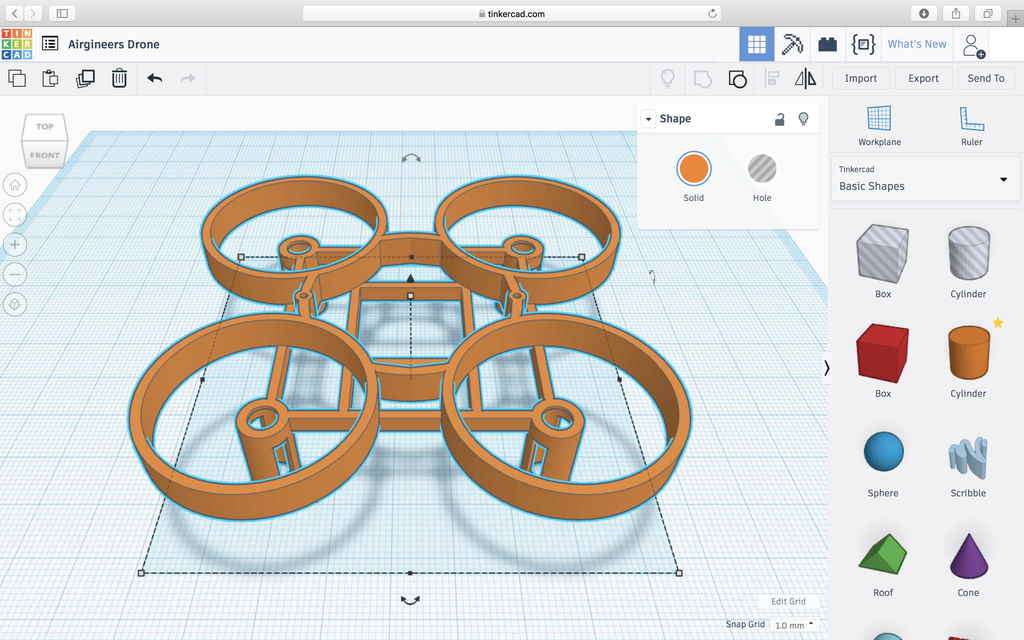
Well firstly, we need something to print. The first basic requirement of any 3D printing process is a CAD Model. It is the 3D design for the product you want to print and the final output has to be 3D printed. The final file format must be in .STL or .OBJ, with them being the most popular file outputs. TinkerCAD and Onshape are 2 of the most popular CAD software extensively used to build CAD models from scratch.
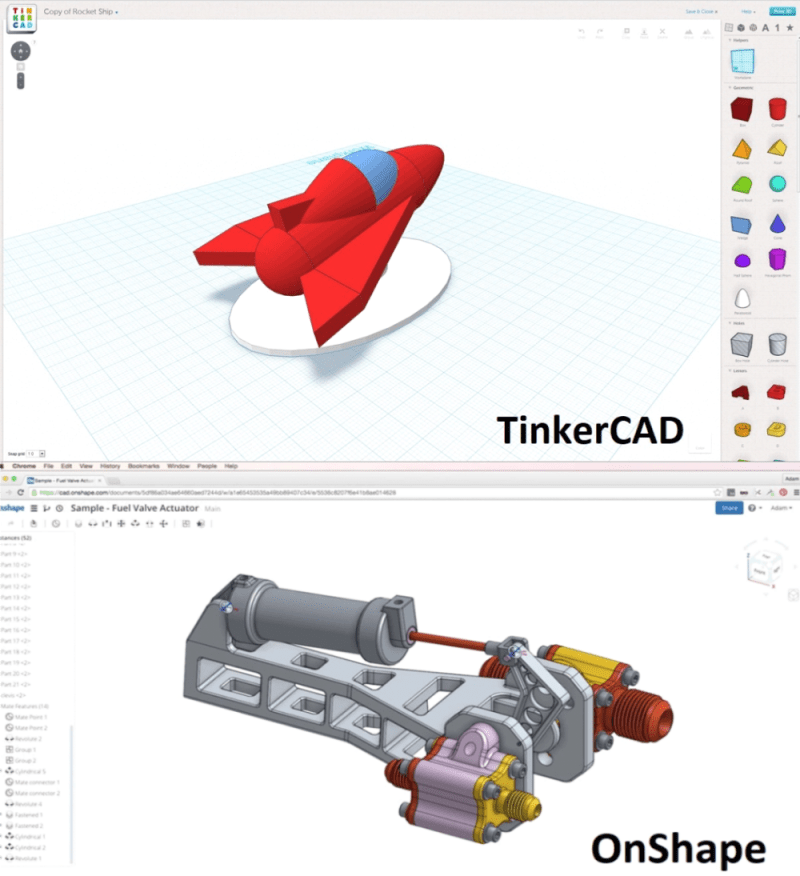
TinkerCAD is a browser-based computer-aided design (CAD) app from Autodesk that serves as a good entry point for beginners. You can use this 3D printing software to build 3D models from basic shapes, customizing parameters, and allows you to create 2D and convert them into 3D models. Onshape is an enterprise-grade software suite that comes with powerful tools like parametric 3D modeling and STL file viewing, editing, and repairing 3D printing software making Onshape suitable for more advanced users.
If you don’t have the time or patience for tinkering, there are sites like Thingiverse and Yeggi from where models from other creators can be downloaded and printed on your 3D printer for free.
SLICING THE 3D MODEL
Slicing is the step where the Slicer software converts the 3D model into individual layers for the 3D printer to understand and print. This software tells the 3D printer where to point the nozzle and squirt the molten plastic. These slices (also called layers) are then deposited one above the other during the printing process. The slicer converts the design into coordinates which the printer understands and the material is deposited as per the coordinates.
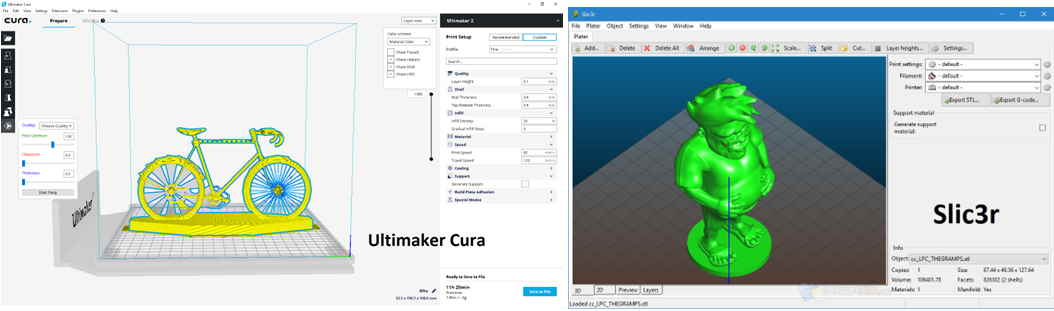
The output of this slicer is in the form of a text file with a file extension being .gcode. Ultimaker’s Cura, PrusaSlicer, and Slic3r are the most popular choices when it comes to slicer software.
Cura is one of the most popular and widely used 3D printing slicers on the market, there’s a good chance that the optimal profile settings for your 3D printer is available on the Cura software as default, making it easy to get started right away without having to mess around the settings. PrusaSlicer has gained a lot of popularity for featuring vast lists of tunable settings and also has some handy useful features. Slic3r is an open-source slicer software with a reputation for offering cutting-edge features that can’t be found anywhere else.
SETTING UP THE 3D PRINTER AND THE PARAMETERS
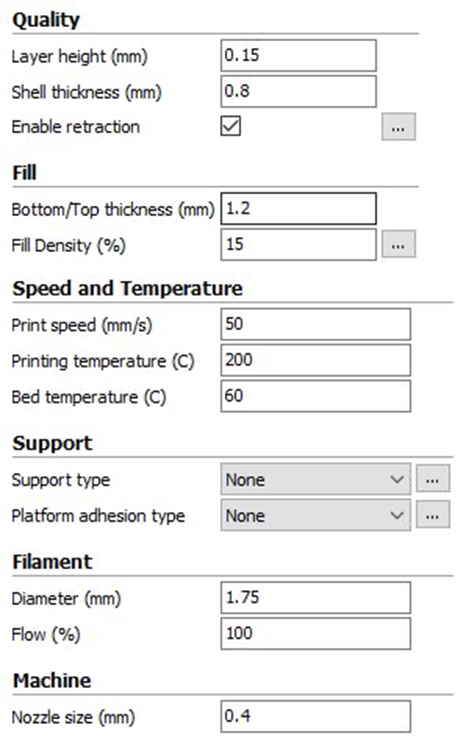
This is the stage inside the Slicer software where we tinker with the parameters to get the desired model. As a beginner, we recommend you stick to the default settings, and once when you gain enough knowledge and experience in 3D printing, you can always play around.
It is easier said than done by changing the print speed from 20mm/s to 100mm/s to get faster prints. There are various parameters like feed rate, infill, feed rate, nozzle retract among few others to factor in which might be too much in the beginning.
Take baby steps. Read this guide on how to modify the settings to get faster prints.
3D PRINTING
This is the easy part, you load the model onto the 3D printer and hit start to start printing. Depending on the printer you have, you can load the model to the 3D printer via USB, an SD card, transfer the model over a mobile-based application, or print from a cloud service.
Make sure the model is placed in a well-ventilated place so the fumes from the molten plastic has a place to escape. Keep an eye on the printer to ensure it is printing. Sometimes the filament might break or the nozzle might get clogged resulting in the filament not coming out of the nozzle. Saves you time and money if you spot this quicker.
END RESULT
When the printer is done printing, the printer turns off and notifies you on your smartphone if the printer supports it or you can just find out when the “eek eek eek” creaking music stops. Now all you have to do is pry the model out from the print bed and is ready to use. If the printer uses a heated bed, DO NOT TRY TO REMOVE THE MODEL IMMEDIATELY AFTER THE PRINTING STOPS. The print bed will still be hot and you will burn your hands.
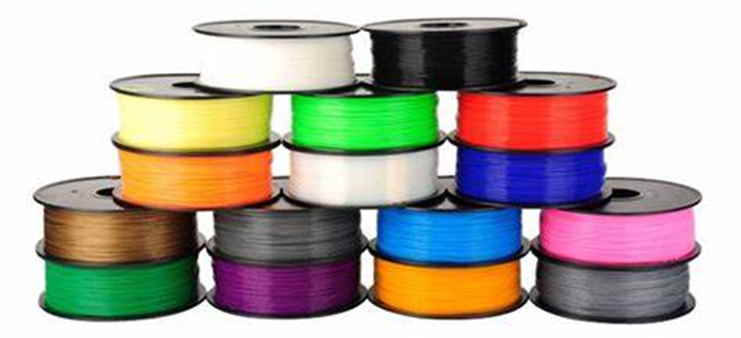
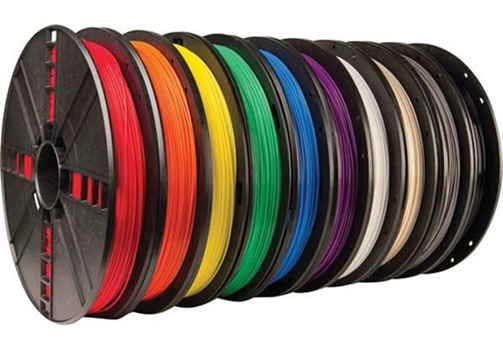
WHICH FILAMENT TO USE?
A 3D printer plastic, also known as the filament for 3D printing, serves as the ink for the 3D printer. 3D printer filaments come in different types and your filament choice depends on the object that you want to print and the desired physical and chemical properties of the model. Some filament types are demanding to print, while some filaments can get you printing right out of the box. Let’s take a look below.
PLA (Polylactic Acid)
PLA is the most popular filament, often credited to its ease of printing with a melting point of around 150- 160°C. PLA is a biodegradable thermoplastic that is derived from biodegradable resources like cornstarch and sugar cane. PLA is environment-friendly compared to other plastic materials. Another benefit of printing with PLA is that it requires a very low printing temperature. This means that you won’t be running into problems with warping or stringing that are very common with high-temperature filaments.
ABS (Acetonitrile Butadiene Styrene)
ABS is another popular filament because the models printed with ABS have high strength and resilient nature which make it suitable for applications that require impact resistance. ABS melts at a higher temperature of 220- 250 °C which makes it prone to warping when cooled and relatively difficult to print. ABS filaments produce toxic fumes in their molten form during printing, making it dangerous to print with ABS in a room without ventilation.
PETG (Polyethylene Terephthalate Glycol)
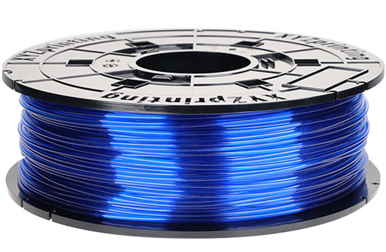
PETG is a variation of Polyethylene Terephthalate (PET), one of the most heavily used plastics in the world. While PET has high mechanical strength and moisture-resistant characteristics, adding glycol into the mix results in a plastic that is much more durable, clearer, and easier to handle. PETG filaments melt at a conservative 220- 245 °C and the physical properties of PETG make it suitable for printing objects that will be subjected to a lot of physical stress.
Nylon
Nylon filament is a popular synthetic polymer that is also used in many industrial applications. This 3D printer filament is a cost-effective plastic. It is strong, lightweight, flexible, and wear-resistant. Nylon is the best 3D printer filament for parts that require a lot of mechanical wear and tear. It also has an exceptionally good abrasion resistance. Nylon melts at 260- 280 °C, exhibits excellent layer-to-layer adhesion, further making nylon prints much more durable than those made with other filament materials.
SUMMARY
Have you watched how the large bells atop the Churches are made? A mold out of sand is made and the metal is poured into the cavity to form the basic shape of a bell, the hot metal is let to cool down and solidify. The mold is taken apart, the sand removed and a rough shape is obtained, the bell is smoothed off its rough edges, polished, and is ready to be rung by worshippers of the Almighty.
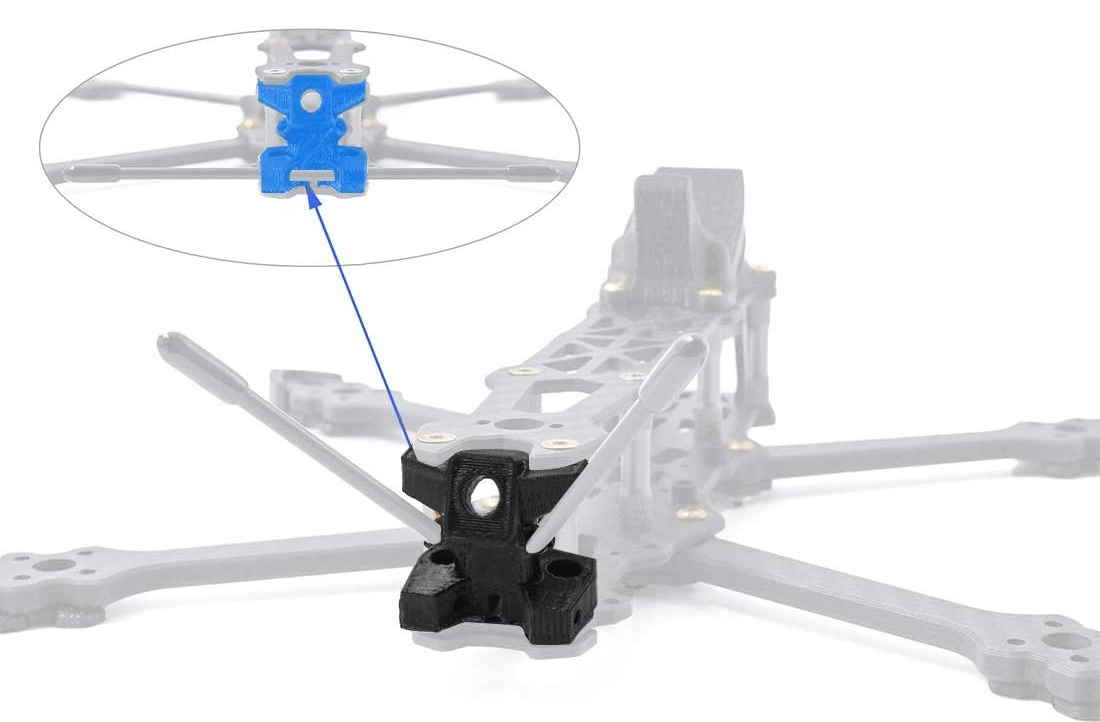
3D Printers changed the way rapid prototyping works. 3D printers are flexible pieces of machinery that have evolved over time to print plastic, metal, and even concrete, 3D printed homes are a thing now. 3D printers are only limited by your imagination, well, and the build volume. In the world of FPV, 3D printers can help you to produce, right from the camera mounts to antenna mounts which eliminate the need to shipping times while also costing much lesser, to the frames themselves, yes you can 3D print Carbon Fiber. Hope this guide helped you to choose best 3d printer for drone parts you need. The applications are limitless, maybe 3D printed frames will be a thing one day. Have fun flying!!
- Drone Pipeline Inspections in Oil and Gas Industry - November 23, 2023
- Wind Turbine Inspection using Drones - November 16, 2023
- Agriculture Drone Mapping: Data-Driven Decisions - October 29, 2023