
How to Solder FPV Drone Components | Tips & Tricks
Soldering is an unavoidable, easy yet messy process that cannot be dodged when building a drone. Yes, BNFs and RTFs are available, but what happens when you crash or burn an ESC? Soldering is an integral process in the building of a drone. Soldering is what stitches the components together to work as one single unit. Soldering the batteries to the ESC allows the transfer of power from the batteries to the ESC’s. Without soldering the receiver to the flight controller, the quad cannot get off the ground.
Soldering is the process of joining 2 or more metal contacts by melting a filler material into the joint. The filler material has a significantly lower melting point than the metals being joined. This ensures that the metal being joined do not get damaged in the process of soldering.
Soldering, for novice users might require some attention to get a good solder joint. Today we are going to take a look at the common practices and useful tips to soldering FPV components efficiently and with minimal efforts.
HOW SOLDERING WORKS?

A reasonably good bond between the 2 wires can be achieved by twisting the wires together and current only flows between the wires where the wires are in contact with each other. Joining wires to pads is also near to impossible without soldering. But in the process of soldering, the molten solder flows through the holes and gaps of the joints, filling it and forming a solid connection between the 2 components.
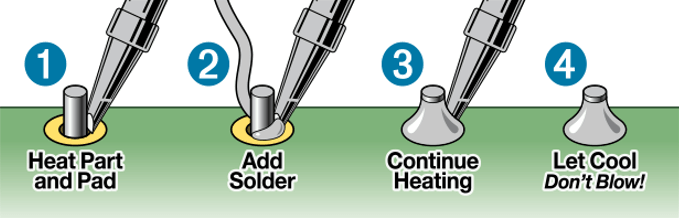
Soldering requires 2 contact surfaces to be joined, 2 wires or wires to solder pads, a heated soldering Iron tip to melt the solder and liquid solder flows into the gaps of the 2 joints and some solder flux which helps clean the surface of the 2 metal contacts preventing oxidation of the metals.
When the Solder is exposed to heat, the solder instantly melts and continues to be in this molten state until the soldering iron is removed.
Prolonged exposure to heat may cause the metals to chemically react and form oxides, physically damage the components. Soldering electronic components, Flight controllers and ESC’s, must be quick to prevent any damage to the them.
SOLDERING IRON
Soldering Irons are components that have heated tips, help melt the solder. You might have tried soldering at some point and tried to solder, but no matter what you do the solder wouldn’t stick to anything and formed blobs? Having a clean tip is critical in ensuring a solid bond.
A good soldering Iron must be able to change the temperature of the tips for various solder jobs. Soldering Irons were traditionally large and bulky for their temperature controllers. But with technology advancements, portable soldering Iron are just as capable. Perhaps the Sequre SQ D60 or the much capable TS80 and the TS100 might appeal to you.
Related Tools:
SOLDER
Solder is the filler metal, is a low melting point alloy usually made of tin or lead that flows into the joints and help form a solid bond. Solder is made of Tin and Lead, 60/40 solder contains 60% tin and 40% lead has a melting point of 182°C, whereas a 40/60 solder has a 40% Tin and 60% Lead has a 237°C melting point.
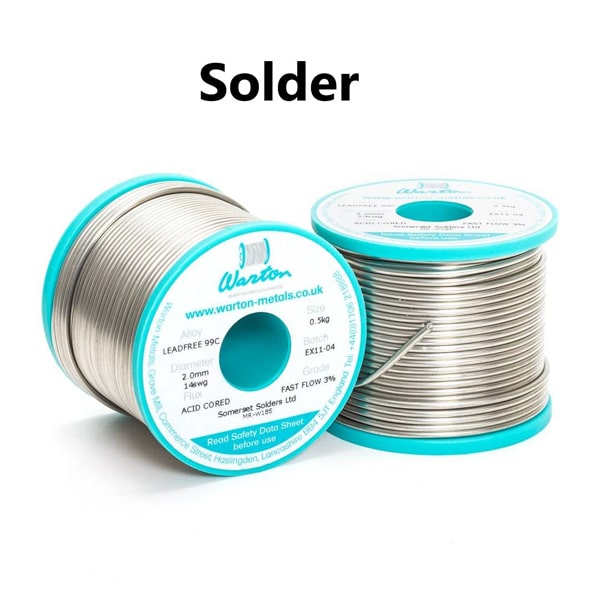
The increased Lead content increases the melting point of the solder and also increases the time the solder takes to cool thereby allowing to move and adjust. Though the use of lead has reduced in recent times citing the poisonous nature of lead on human health, Lead still continues to be an integral component of solder.
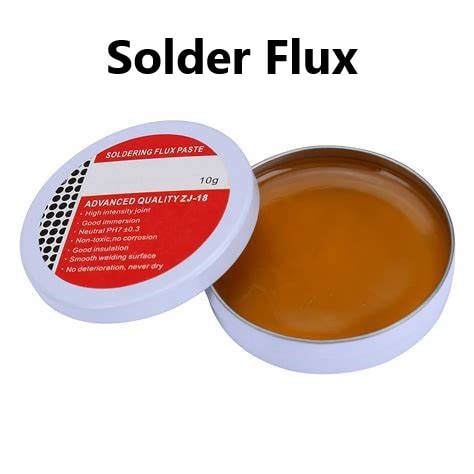
SOLDER FLUX
Solder flux is a paste like material that is applied on the surface of the materials to be joined or soldered. Solder flux promotes better wetting of the surfaces and helps remove the oxides of the metals, Metal Oxides are formed when the metal is exposed to heat and air, preventing the formation of good solder joints. Flux also contain chemicals that prevent the exposed metals from corroding.
The smoke and fumes released while soldering include several chemical compounds from the acids and their reaction with the oxide layers. Other compounds such as formaldehyde, toluene, alcohols, and acidic fumes are often present in the solder fumes.
These fumes when inhaled can lead to coughing, shortness of breath, wheezing and chest pain are among the symptoms of asthma and the fumes can also cause the eyes to irritate and burn. Ensure adequate ventilation and, as necessary.
This can be avoided by sitting in a room with proper ventilation and a fan blowing the fumes away from you. Thorough washing of hands after soldering is necessary to avoid any lead particulates from entering the body.
SOLDERING WICK, HELPING HANDS AND TWEEZERS
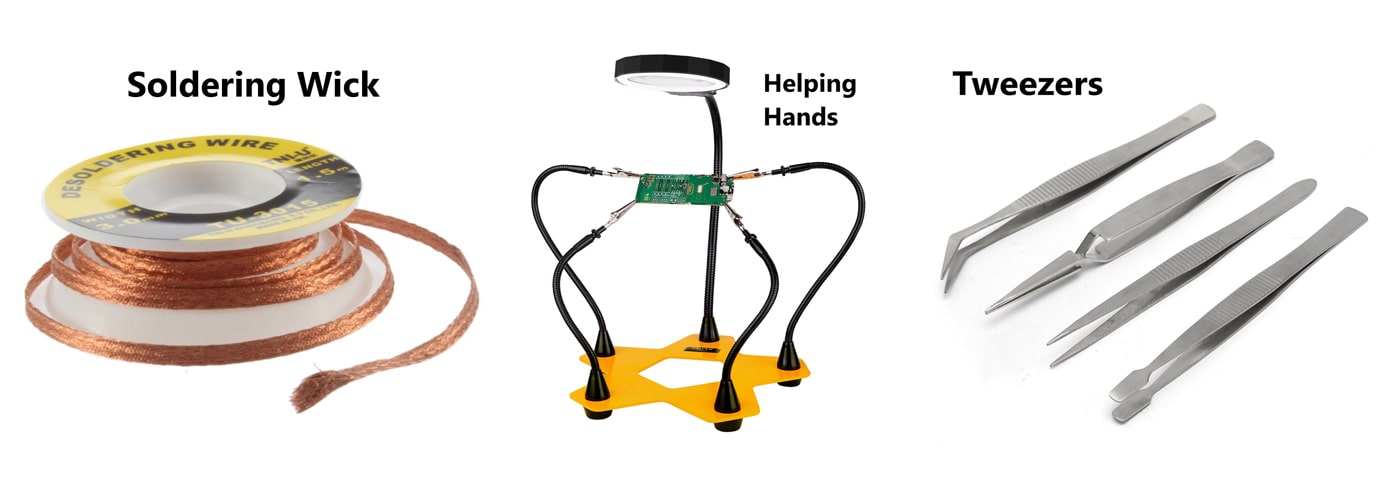
Apart from Soldering Iron, Solder and Flux, you will need Soldering Wick, Helping hands and Tweezers. Things don’t exactly as planned and there is no exception with soldering. When a bad solder joint happens, Soldering wick comes to the rescue and helps you clean up. Soldering wick contains copper which the solder particles stick to. Solder wicks are non reusable and they are cheap to replace.
I sometimes wish I had more than 2 hands, soldering is when I wish I had 3 hands or even 4. Helping hands hold the components in place and lets you solder without you having to worry about the component moving. Tweezers are a must have when soldering. Soldering involves heat and the human hands can only tolerate so much heat, tweezers are helpful to hold down the wires during soldering.
HOW TO SOLDER FPV DRONE TIPS & TRICKS
Soldering is an easy- not so easy process. There are some good practices to follow to get a good solder joint. Mastering the art of soldering is essential or maintaining a quad becomes a nightmare. We are going to demystify the process of soldering.
Do’n use led free solder - G0/40 lead perfect
Cleaning the Tips
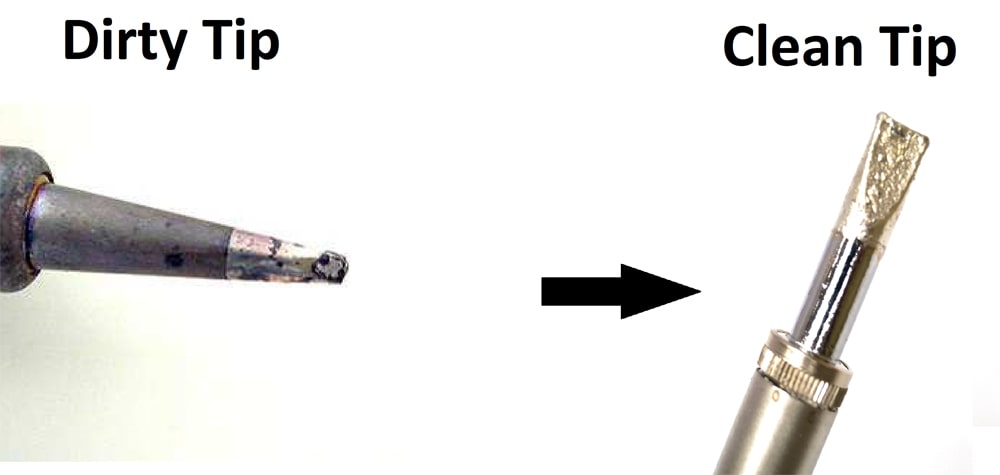
A clean soldering iron tip is the key to the soldering. Maybe you tried soldering, the solder would not stick to the wire or the tips and forms balls of solder? The culprit is bad soldering tips. The heating of the solder tips causes the tips form oxides and the ability for the soldering iron tip to transfer heat is drastically reduced when it gets covered in oxides and burnt flux residues.
Cleaning before and after every solder job and occasional cleaning between long solder jobs ensures that the tips are clean resulting in a less frustrating soldering experience and longer tip life.
The tips can be cleaned with a damp towel or brass wool. If the tips are very dirty, sanding the tips with a fine grit sand paper and cleaning the tips afterwards with a towel is the recommended. When not in use, coating the tips with solder prevents the tips from oxidation when exposed to the atmosphere.
Setting the Temperature
Every solder job is different and require different temperatures to start with. Setting the right temperature is crucial to avoid overheating the Solder pads. Solder pads are metal contacts made of copper that can lift under long exposure to heat. A higher temperature melts the solder faster.
A temperature of 325- 350°C for soldering the ESC wires and the receiver wires to the flight controller is ideal. A slightly higher temperature of 400°C can be used to solder the battery pads as these involve large amounts of solder, taking longer to melt.
Avoid holding the soldering iron tip on any components for long. I have this 5 second rule, if the wire is not joined by then, Abort Mission!! Let the pad cool down for a bit and try again. If you spend longer, there is a chance that you might lift the solder pad rendering that pad and potentially that component useless.
Cutting, Stripping and Tinning

Cutting the wires and stripping the wires to the appropriate lengths comes next. It is important to measure twice or even thrice before cutting the wires of motors. If you cut the wires too short, yikes you are in trouble. Motor wires are difficult to extend when cut short and can be a hassle to extend them, better be safe than sorry, or if you like a challenge cut the wires short and have a blast trying to extend it.
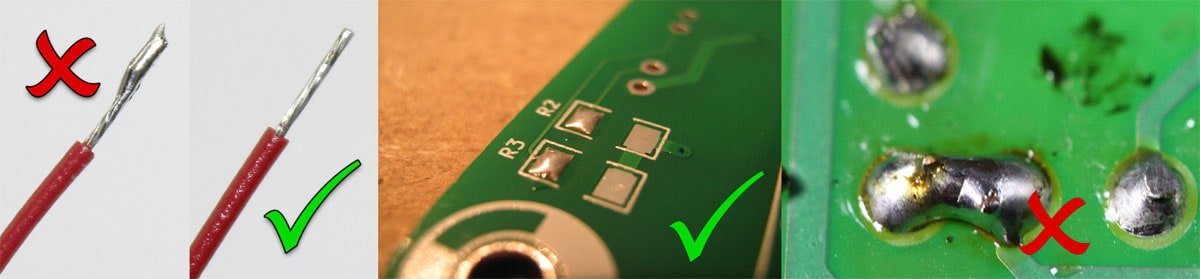
Cut the wires such that the wires have an excess of 2cm to give you some room for error. Stripping the wires is crucial, strip the wires to the appropriate lengths, the exposed wire is as long as the pad you are soldering it to. If stripped in excess, the resulting soldering joint looks unprofessional and there is also the risk that the exposed wire might touch the components nearby and cause a short.
Pretinning is the process of applying a light layer of solder over both the components that are being joined or soldered. The idea behind this is that, solder is a very good conductor of heat and dissipates heat evenly and quickly.
Pretinning also reduces the time taken for the solder to melt when joining thereby reducing the risk of overheating components. This is helpful when soldering small and delicate components which might get damaged when exposed to high temperatures over a period of time.
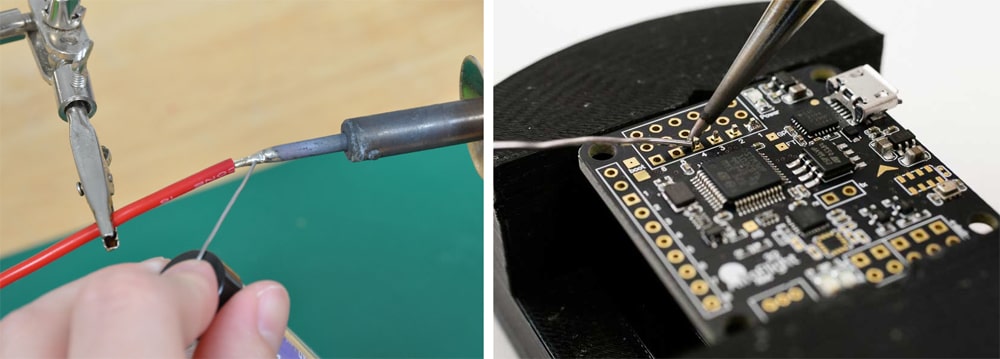
Pretinning can be done by first taking the soldering iron near the wire or the pads, heat it and push the solder until a good amount of solder is applied. When Pretinning pads, apply solder until a semi circle is formed over the pad and for wires until an even layer of solder is formed. Be careful not to apply too much solder as there is also a risk that the solder might overflow and short the nearby pads.
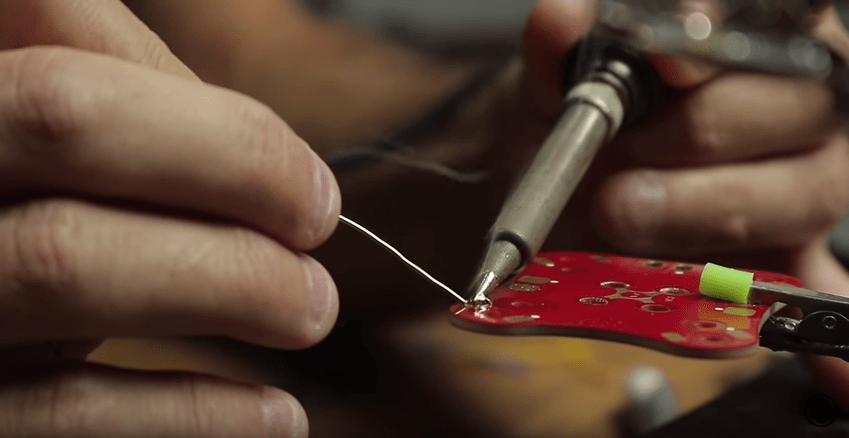
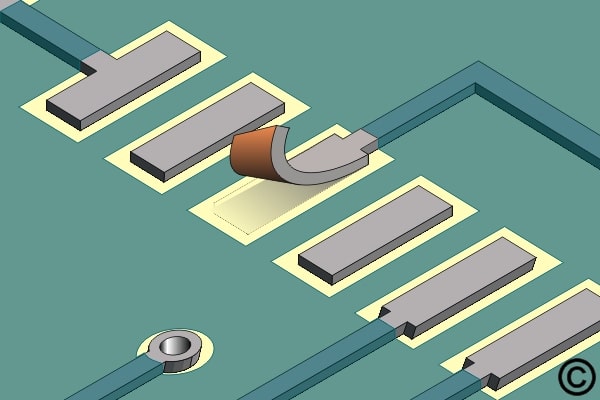
Soldering to pads
Turn on your nerd modes. It’s going to get exciting from here. Now with the wires and the pads pretinned, it is time to join the bride and the groom in a bond that will last forever, or until the board gets damaged atleast.

Take the wire in one hand, the less dominant one, use tweezers if you think you can’t tolerate the heat. Hold it firmly on the solder pad, try not to move the wire as much as possible. Then take the soldering iron and hold it on the wire firmly for a second for the solder to completely melt and form a solid bond between the pad and the wire.
There is also another way to do this, take the soldering iron, hold it on the solder pad and melt the solder. Now place the wire over the molten solder to join the wire and the pad. This increases the risk of overheating the components but soldering smaller wires and joints involve less solder and the solder will melt instantly. Take the soldering iron away from the pad, now with no heat to keep the soldering iron in a molten state, the solder begins to solidify forming a solid joint.
Soldering through holes
Personally, I think soldering through holes method is a better. There is no risk of the wire getting stripped away from the solder pad and with it the pad.
Soldering through holes is also the easiest to solder. Through holes were earlier used to solder pins but the manufacturers are providing a large enough hole for the wires to pass through. But the wires sticking out increases the risk of wires shorting themselves and repairs require longer to remove the entire stack.
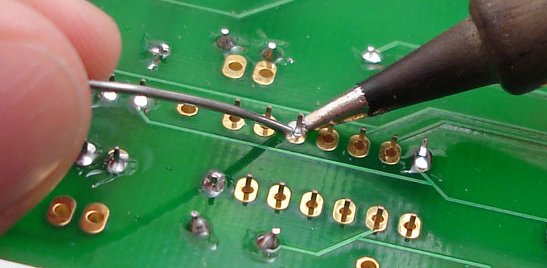
To solder wires to through holes, you pre-tin the wires with a very small coat of solder, but not the holes. Pass the wires from below the flight controller such that the ends are poking out at the top side of the flight controller.
Now take the soldering iron and place it near the end that is sticking out and apply some solder, apply a generous amount until a small mound forms on the top. Did I already tell that the solder on the wires melt and attach to the sides of the holes?
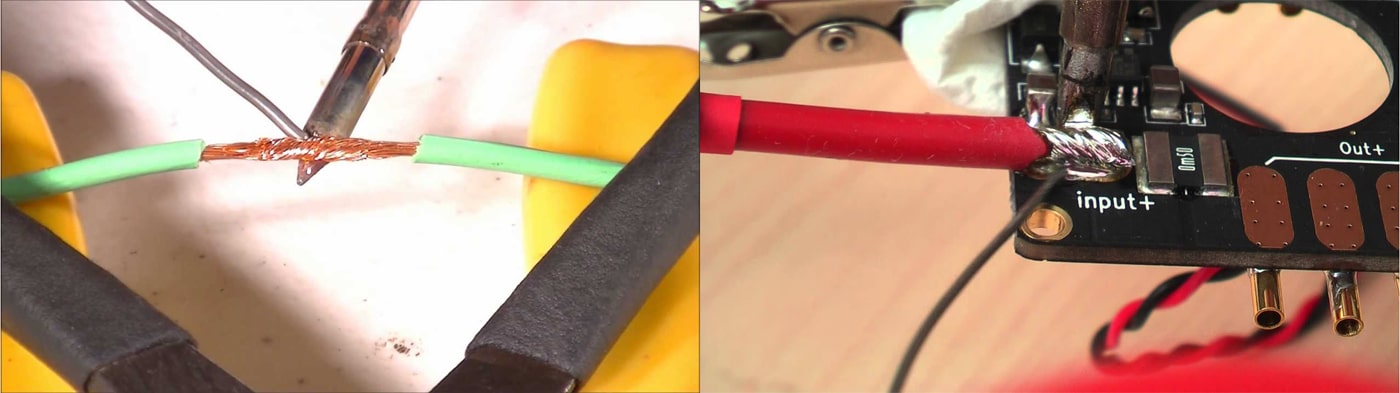
Soldering 2 wires
Joining or extending wires must be avoided because that is a potential weak link that might give way under load. Extending the Motor wires, Battery and ESC wires must be avoided as these wires carry large loads and can potentially fail. Whereas the receiver and camera signal wires have lesser loads and will cope well with the lower current loads.
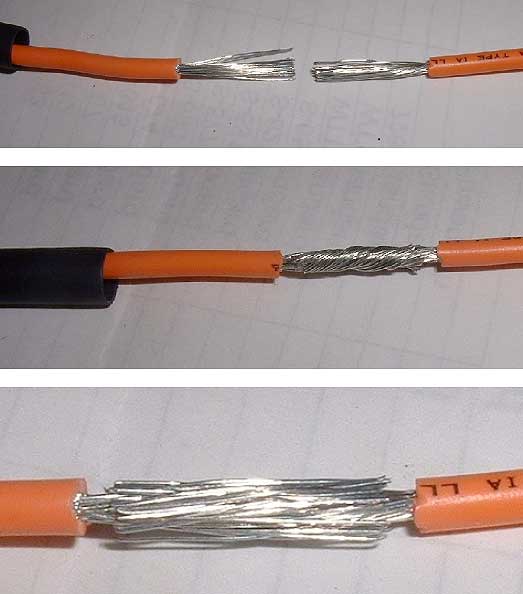
I have had crashes where the propellers cut the motor wires and I had to extend the motor wires, Bill Gates can afford to throw away a $30 motor not me. The trick to soldering thinner wires is to pretin the wires and join them. But the trick to joining thicker wires is, do not pretin the wires and spread the wire strands and thrust both the wires together and solder them into place.
Soldering connectors
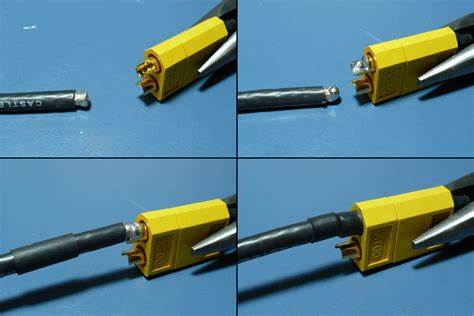
Soldering the connectors to wires can be a pain. The metal contacts on an XT60 is small, getting in there and soldering is a nightmare for me, I apologize to all the XT60 connectors I had to throw before they could serve their purpose.
Connectors must mostly always be soldered with the male and female connectors mated, I’ve learnt this the hard way.
The plastic covering the metal contacts can and will melt before you can join the wire and mating the male to the female will prevent the metal contacts melting away into the connector.
Check and adjust the temperature of the soldering iron, 375-400°C to ensure a quick and easy soldering job. Pretin the wire and the metal contact on the connector, applying generous amounts of solder on both. Melt the solder on the wire, now place the wire and soldering iron on the metal contact and gently press on the wire onto the connector.
Once the solder on the connectors melt, remove the soldering iron after a second to let the solder to form a solid bond. Not happy with the solder job, let the solder and the plastic covering to cool before going in and adjusting. Apply some shrink wrap over the wires and you are ready to rumble, or should I say the quad is.
GOOD AND BAD SOLDER JOINTS


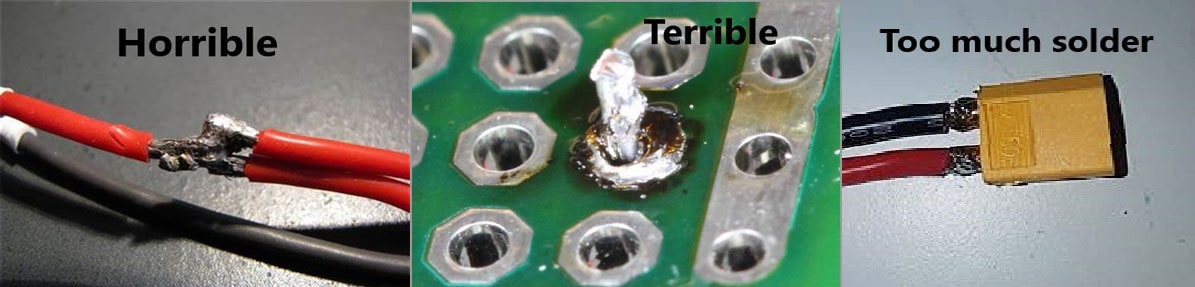
Take a look at this definitive article that details the various bad solder joints.
Consequences of bad solder joints
- Incomplete circuit - Since the solder connections is the only means of power and data transmission, an incomplete circuit will result in loss of power and data signals abruptly. If a motor has been jittering lately, check the soldering of the motor signal wires and the ESC connections.
- Power losses- A bad solder joint will limit the flow of current, possibly limiting the motors from working to their full potential
- Overheating- A bad solder joint when stressed will overheat the joint and the component potentially causing the solder to melt, causing an incomplete joint.
- If you have joints that have been losing solder over time, the problem might be in the solder you are using. A 60/40 or 63/37 solder must be used for easy soldering.
CONCLUSION
Soldering is an essential part of drone building which cannot be avoided. Crashing a quad is inevitable and so is repairing it. Not only is soldering useful to build and repair a quad, soldering is useful skill every guy must know.
In this article we have tried to cover most of the basics to get you started on your journey of building a quad. Try to practice to soldering, there are soldering practice boards such as the mamba practice board which are cheaper to practice on. Investing in a good soldering iron is the key and if you followed this article up to the conclusion, congratulations your Soldering 101 classes are done for the day.
- Drone Pipeline Inspections in Oil and Gas Industry - November 23, 2023
- Wind Turbine Inspection using Drones - November 16, 2023
- Agriculture Drone Mapping: Data-Driven Decisions - October 29, 2023